


Take a Closer Look

Unboxing & Install


FAQ
It is very straightforward, but the downloadable PDF instructions leave a lot to be desired. I highly recommend using the top-rated "how to build" video, along with the PDF. Here is a link to that video:
https://www.youtube.com/watch?v=me8Qrwh907Q
The video contains a huge number of hints which, having now completed my first 3D print, which was 100% successful, I can now fully appreciate. The video helps you get everything square, and makes sure that many minor adjustments which were not done perfectly at the factory, are tweaked just right.
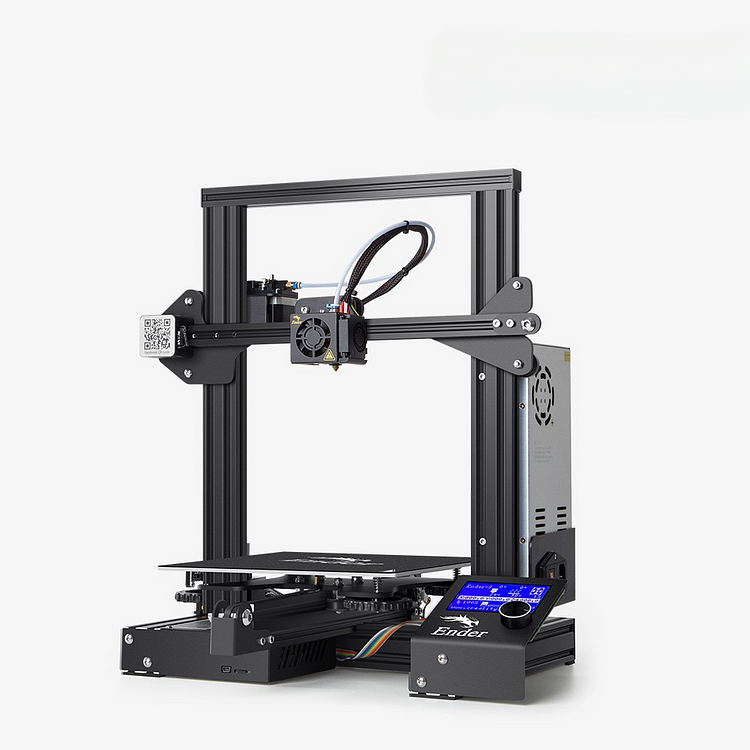
Printer size is 220*220*250
The stuff product uses the 1.75 mm filament. Any 3D printer can be modified to use the three mm but that requires a much more intimate knowledge of 3D printing machines.
Yes.
Yes it does come with a a spool holder which mounts to the top of the frame
1. Heat the spray head to 230 degrees Celsius and keep the same temperature to remove the spray head kit; and then remove the heating block and throat separately. After removing, the spray head can heat to the lower temperature.
2. Prepare a bottle of red glue (available from Taobao), apply the red glue to the thread of the throat, let it rest for 1 minute, then reinstall the throat and heating block, and then install the nozzle kit back to the original Bit;
3. If there is still the same issue, please contact the after-sales customer service.
1. Under the condition of no heating, determine whether the temperature of the display screen is normal room temperature. if not, it is likely to be a thermal problem, please replace a new one;
2. Under the condition of heating, test whether the output voltage of the hot bed port of the motherboard is 24V. If there is no voltage, it is a problem of the motherboard.So pleas replace a new motherboard.
1. Under the condition of no heating, determine whether the temperature of the display screen is normal room temperature. if not, it is likely to be a thermal problem, please replace a new one; 2. Under the condition of the heating, test whether the output voltage of the nozzle port of the main board is 24V. If there is no voltage, it is the main board problem. Please replace the new main board. Otherwise, it is likely to be a heating tube problem. You need to replace the heating tube.
1.Please make sure the the screen cable is plugged into the EXP3 interrace on the back of the screen. 2. Please check the screen to make sure it's broken or not, if there is the obviously , please replace the new screen; 3. Please restart the button to make sure there is beeping sound. If there is not any beeping sound, the mainboard has some problem, so please replace the motherboard. Otherwise, it could be the some promblem with the screen, please replace the screen.4.If you have any problem with your printer, please contact the after-sale customer service.
1. Slicing problem, the slicing is unsuccessful or not completely exported, just re-slicing or waiting for the export progress buffer to be completed. 2.The file transfer is interrupted during the SD card printing process, please replace the SD card or format it to have a try.3.If it's still the same issue, please contact the after-sale customer service.
1. Clean the fan and check whether there is debris interference ;
2. Check whether the screws and fan cover are loose, and then re-fix it;
3. Check if the fan blade is damaged or broken, please replace a new fan.
1. Check whether the limit wiring has fallen off;if yes, please reinstalled;
2. Check whether the limit switch itself is intact, if there is damage, please replace the new limit switch; 3.If it's still the same issue, please contact the after-sale customer service.
This situation is generally a screen quality problem, please replace the new screen.
1. Format the SD card; 2. Check whether the card slot is loose; 3. Please clean the card slot with alcohol to oxidize it; 4. Replace the card slot / motherboard.
Replace with a new power supply.
