


Creality Falcon2 Laser Engraving & Cutting Settings
Welcome to your go-to guide for making the most out of the Creality Falcon2 laser engraving and cutting machine! This manual is designed to unlock the best settings for power, speed, material adjustments, and more, making it perfect for both enthusiasts and beginners alike. Here, you'll find detailed instructions on how to achieve perfect precision in your projects, whether you're creating detailed artwork, unique gifts, or professional-grade prototypes. Let's enhance your crafting ventures by harnessing the true capabilities of the Falcon2. Dive into this guide and discover how to unleash the full potential of your machine.

Explore Falcon2's Technical Specifications First.
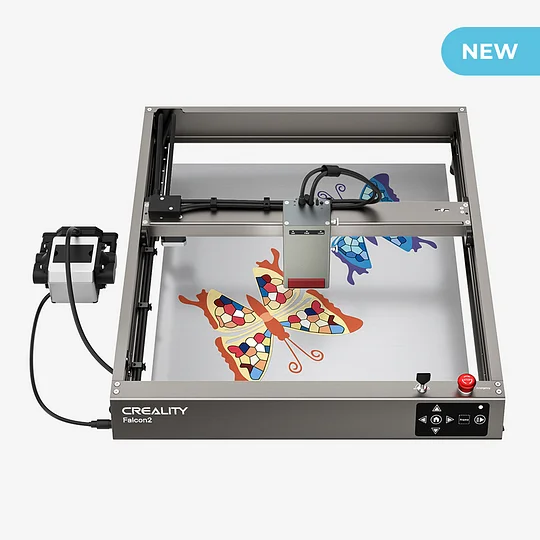
Falcon 2 12W/22W/40W Laser Engraver & Cutter Specs
| Product Name | Creality Falcon2 Technical Specifications | ||
| PIC. |  |
 |
 |
| Laser Model | Falcon2 12W | Falcon2 22W | Falcon2 40W |
| Machine Power (MAX) | 120W | 120W | 240W |
| Optical Power | 12W | 22W | 40W |
| Product Size | 664*570*163mm | 664*570*173mm | 664*570*193mm |
| Package Size | 725*625*150mm | ||
| Equipment Weight | 7.14kg | 7.18kg | 7.68kg |
| Gross Weight | 10.31kg | 10.35kg | 10.94kg |
| Input Voltage | 100-240V~ 50-60Hz | ||
| Output Voltage | DC 24.0V 5.0A | DC 24.0V 10.0A | |
| Operating Temperature | 5℃-35℃ | ||
| Engraving Area | 400mm*415mm | ||
| Laser Source | Diode Laser | ||
| Laser spot | 0.06*0.08mm | 0.08*0.1mm | 0.08*0.12mm |
| Laser Wavelength | 455±5nm | ||
| CLASS | Class IV (FDA) | ||
| Laser Engraving Software | LightBurn、LaserGRBL | ||
| Operating System | Windows/MacOS | ||
| Supported File Formats | Jpeg, jpg, png, bmp, svg, dxf, etc. | ||
| Supported Materials | Cardboard, wood, bamboo, rubber, leather, fabric, acrylic, plastic, etc. | ||
| Certifications | IEC60825、FDA、CE、ROHS、FCC、UKCA、UL Report、PSE | ||
Falcon2 40W Laser Engraving & Cutting Parameter Settings
| Processing | Material |
Thickness (mm) |
Recommended Power(%) |
Recommended Work Speed (mm/min) |
Passes |
| Engraving | Basswood | 2 | 25 | 6000 | 1 |
| Walnut Plywood | 3 | 20 | 6000 | 1 | |
| Rosewood Plywood | 3 | 20 | 6000 | 1 | |
| Bamboo | 3 | 25 | 6000 | 1 | |
| Kraft Paper | 0.15 | 12 | 6000 | 1 | |
| Red Card Paper | 0.2 | 8 | 6000 | 1 | |
| Red Felt | 0.8 | 7 | 6000 | 1 | |
| Brown Leather | 0.65 | 12 | 6000 | 1 | |
| Black Opaque Glossy Acrylic | 3 | 26 | 4000 | 1 | |
| Purple Opaque Glossy Acrylic | 3 | 26 | 6000 | 1 | |
| Red Opaque Glossy Acrylic | 3 | 26 | 6000 | 1 | |
| Orange Opaque Glossy Acrylic | 3 | 26 | 6000 | 1 | |
| Green Opaque Glossy Acrylic | 3 | 26 | 6000 | 1 | |
| Red Transparent Acrylic | 3 | 12 | 3000 | 1 | |
| Yellow Transparent Acrylic | 3 | 12 | 3000 | 1 | |
| Green Transparent Acrylic | 3 | 12 | 3000 | 1 | |
| Black Frosted Acrylic | 3 | 22 | 3000 | 1 | |
| Orange Frosted Acrylic | 3 | 30 | 1200 | 1 | |
| Green Frosted Acrylic | 3 | 30 | 1200 | 1 | |
| Purple Frosted Acrylic | 3 | 30 | 1000 | 1 | |
| Anodized Aluminum | 3 | 30 | 6000 | 1 | |
| Brushed Stainless Steel | 2 | 40 | 6000 | 1 | |
| White Tile Painted Black | 6 | 28 | 4000 | 1 | |
| Cutting | Basswood | 2 | 100 | 1000 | 1 |
| 3 | 100 | 850 | 1 | ||
| 5 | 100 | 700 | 1 | ||
| 8 | 100 | 400 | 1 | ||
| 10 | 100 | 300 | 1 | ||
| 15 | 100 | 150 | 1 | ||
| Walnut Plywood | 3 | 100 | 750 | 1 | |
| 5 | 100 | 600 | 1 | ||
| Rosewood Plywood | 3 | 100 | 750 | 1 | |
| 5 | 100 | 600 | 1 | ||
| Bamboo | 5 | 100 | 800 | 1 | |
| Kraft Paper | 0.2 | 40 | 4000 | 1 | |
| Red Card Paper | 0.2 | 30 | 4000 | 1 | |
| Red Felt | 0.8 | 35 | 4000 | 1 | |
| Brown Leather | 0.65 | 70 | 4000 | 1 | |
| Black Acrylic | 4.6 | 100 | 180 | 1 | |
| 7.6 | 100 | 120 | 2 | ||
| Purple Opaque Glossy Acrylic | 3 | 30 | 120 | 2 | |
| Red Opaque Glossy Acrylic | 3 | 30 | 120 | 1 | |
| Orange Opaque Glossy Acrylic | 3 | 30 | 120 | 2 | |
| Green Opaque Glossy Acrylic | 3 | 30 | 120 | 3 | |
| Red Transparent Acrylic | 3 | 30 | 120 | 3 | |
| Yellow Transparent Acrylic | 3 | 30 | 120 | 2 | |
| Green Transparent Acrylic | 3 | 30 | 120 | 3 | |
| Black Frosted Acrylic | 3 | 30 | 180 | 1 | |
| Orange Frosted Acrylic | 3 | 30 | 120 | 3 | |
| Green Frosted Acrylic | 3 | 30 | 120 | 3 | |
| Purple Frosted Acrylic | 3 | 30 | 120 | 3 |
Tips:
Compared to 12W and 22W laser modules, the beam of the 40W laser module can be adjusted by pressing and holding the "Reset Button" for 2 seconds after powering on. The indicator lights will show the current mode:
Two lights on (Normal): The maximum output power is 40W. It can cut thicker material and cut faster.
One light on (Precise): The maximum output power is 20W. It can engrave more precisely and leave a narrower kerf.
Falcon2 22W Laser Engraving & Cutting Parameter Settings
Laser Power: 22W Engraving Size: 400mm*415mm
| Processing | Material |
Thickness (mm) |
Recommended Power(%) |
Recommended Work Speed (mm/min) |
Passes |
| Engraving | Basswood | 2 | 40 | 6000 | 1 |
| Walnut Plywood | 3 | 35 | 6000 | 1 | |
| Rosewood Plywood | 3 | 35 | 6000 | 1 | |
| Bamboo | 3 | 40 | 6000 | 1 | |
| Kraft Paper | 0.15 | 18 | 6000 | 1 | |
| Red Card Paper | 0.2 | 15 | 6000 | 1 | |
| Red Felt | 0.8 | 13 | 6000 | 1 | |
| Brown Leather | 0.65 | 18 | 6000 | 1 | |
| Black Opaque Glossy Acrylic | 3 | 50 | 4000 | 1 | |
| Purple Opaque Glossy Acrylic | 3 | 50 | 6000 | 1 | |
| Red Opaque Glossy Acrylic | 3 | 50 | 6000 | 1 | |
| Orange Opaque Glossy Acrylic | 3 | 50 | 6000 | 1 | |
| Green Opaque Glossy Acrylic | 3 | 50 | 6000 | 1 | |
| Red Transparent Acrylic | 3 | 20 | 3000 | 1 | |
| Yellow Transparent Acrylic | 3 | 20 | 3000 | 1 | |
| Green Transparent Acrylic | 3 | 20 | 3000 | 1 | |
| Black Frosted Acrylic | 3 | 40 | 3000 | 1 | |
| Orange Frosted Acrylic | 3 | 60 | 1200 | 1 | |
| Green Frosted Acrylic | 3 | 60 | 1200 | 1 | |
| Purple Frosted Acrylic | 3 | 60 | 1000 | 1 | |
| Anodized Aluminum | 3 | 60 | 6000 | 1 | |
| Brushed Stainless Steel | 2 | 80 | 6000 | 1 | |
| White Tile Painted Black | 6 | 50 | 4000 | 1 | |
| Cutting | Basswood | 2 | 100 | 700 | 1 |
| 3 | 100 | 550 | 1 | ||
| 5 | 100 | 400 | 1 | ||
| 8 | 100 | 240 | 1 | ||
| 10 | 100 | 120 | 1 | ||
| Walnut Plywood | 3 | 100 | 450 | 1 | |
| 5 | 100 | 350 | 1 | ||
| Rosewood Plywood | 3 | 100 | 450 | 1 | |
| 5 | 100 | 350 | 1 | ||
| Bamboo | 3 | 100 | 450 | 1 | |
| Kraft Paper | 0.2 | 80 | 4000 | 1 | |
| Red Card Paper | 0.2 | 50 | 4000 | 1 | |
| Red Felt | 0.8 | 55 | 4000 | 1 | |
| Brown Leather | 0.65 | 100 | 2000 | 1 | |
| Black Acrylic | 4.6 | 100 | 120 | 1 | |
| 7.6 | 100 | 120 | 2 | ||
| Purple Opaque Glossy Acrylic | 3 | 55 | 120 | 2 | |
| Red Opaque Glossy Acrylic | 3 | 55 | 120 | 1 | |
| Orange Opaque Glossy Acrylic | 3 | 55 | 120 | 2 | |
| Green Opaque Glossy Acrylic | 3 | 55 | 120 | 3 | |
| Red Transparent Acrylic | 3 | 55 | 120 | 3 | |
| Yellow Transparent Acrylic | 3 | 55 | 120 | 2 | |
| Green Transparent Acrylic | 3 | 55 | 120 | 3 | |
| Black Frosted Acrylic | 3 | 55 | 180 | 1 | |
| Orange Frosted Acrylic | 3 | 55 | 120 | 3 | |
| Green Frosted Acrylic | 3 | 55 | 120 | 3 | |
| Purple Frosted Acrylic | 3 | 55 | 120 | 3 |
Falcon2 12W Laser Engraving & Cutting Parameter Settings

| Processing | Material |
Thickness (mm) |
Recommended Power(%) |
Recommended Work Speed (mm/min) |
Passes |
| Engraving | Basswood | 2 | 40 | 4000 | 1 |
| Walnut Plywood | 3 | 35 | 4000 | 1 | |
| Rosewood Plywood | 3 | 35 | 4000 | 1 | |
| Bamboo | 3 | 40 | 4000 | 1 | |
| Kraft Paper | 0.15 | 15 | 4000 | 1 | |
| Red Card Paper | 0.2 | 15 | 4000 | 1 | |
| Red Felt | 0.8 | 15 | 4000 | 1 | |
| Brown Leather | 0.65 | 20 | 4000 | 1 | |
| Black Opaque Glossy Acrylic | 3 | 80 | 4000 | 1 | |
| Purple Opaque Glossy Acrylic | 3 | 50 | 4000 | 1 | |
| Red Opaque Glossy Acrylic | 3 | 50 | 4000 | 1 | |
| Orange Opaque Glossy Acrylic | 3 | 50 | 4000 | 1 | |
| Green Opaque Glossy Acrylic | 3 | 50 | 4000 | 1 | |
| Red Transparent Acrylic | 3 | 40 | 3000 | 1 | |
| Yellow Transparent Acrylic | 3 | 40 | 3000 | 1 | |
| Green Transparent Acrylic | 3 | 40 | 3000 | 1 | |
| Black Frosted Acrylic | 3 | 80 | 3000 | 1 | |
| Orange Frosted Acrylic | 3 | 90 | 1200 | 1 | |
| Green Frosted Acrylic | 3 | 90 | 1200 | 1 | |
| Purple Frosted Acrylic | 3 | 90 | 1000 | 1 | |
| Anodized Aluminum | 3 | 100 | 250 | 1 | |
| Brushed Stainless Steel | 2 | 100 | 800 | 1 | |
| White Tile Painted Black | 6 | 85 | 4000 | 1 | |
| Cutting | Basswood | 2 | 100 | 400 | 1 |
| 3 | 100 | 300 | 1 | ||
| 5 | 100 | 200 | 1 | ||
| 8 | 100 | 250 | 2 | ||
| 10 | 100 | 180 | 3 | ||
| Walnut Plywood | 3 | 100 | 280 | 1 | |
| 5 | 100 | 150 | 1 | ||
| Rosewood Plywood | 3 | 100 | 280 | 1 | |
| 5 | 100 | 150 | 1 | ||
| Bamboo | 3 | 100 | 280 | 1 | |
| Kraft Paper | 0.2 | 100 | 4000 | 1 | |
| Red Card Paper | 0.2 | 100 | 4000 | 1 | |
| Red Felt | 0.8 | 100 | 3800 | 1 | |
| Brown Leather | 0.65 | 100 | 2000 | 1 | |
| Black Acrylic | 4.6 | 100 | 300 | 2 | |
| 7.6 | 100 | 250 | 3 | ||
| Purple Opaque Glossy Acrylic | 3 | 95 | 120 | 2 | |
| Red Opaque Glossy Acrylic | 3 | 95 | 120 | 1 | |
| Orange Opaque Glossy Acrylic | 3 | 95 | 120 | 2 | |
| Green Opaque Glossy Acrylic | 3 | 95 | 120 | 3 | |
| Red Transparent Acrylic | 3 | 95 | 120 | 3 | |
| Yellow Transparent Acrylic | 3 | 95 | 120 | 2 | |
| Green Transparent Acrylic | 3 | 95 | 120 | 3 | |
| Black Frosted Acrylic | 3 | 95 | 200 | 1 | |
| Orange Frosted Acrylic | 3 | 95 | 120 | 3 | |
| Green Frosted Acrylic | 3 | 95 | 120 | 3 | |
| Purple Frosted Acrylic | 3 | 95 | 120 | 3 |
Notes:
1. Ensure the laser module's focal length is correctly set and its lens is clean before operation. Clean the lens carefully with a lint-free cloth and alcohol when it is powered off.
2. The provided parameters are for guidance only, as the material's color can affect the outcome. You can achieve the desired effect by tweaking these parameters:
- Generally, using higher power or slower speed creates a deeper engraving
- Lower power or higher speed results in a shallower engraving.
Furthermore, engraving brushed stainless steel can produce vivid colors by adjusting the parameters, although the degree of oxidation varies with different materials. Minor adjustments in focal length and power levels can significantly influence the final result. It's recommended to conduct trials on the material in question.
3. When cutting, the material's bottom should be suspended above the work surface (using a honeycomb worktable is advised) to protect the workbench. Consider placing aluminum plates or similar materials underneath to prevent damage from the laser.
Recent News

6 Halloween 3D Prints for a Cosy Canadian October

Trick or Treat! Creality's Halloween Party Sale Extravaganza – A Haunting Deal is Coming!

Advantages of laser engraving (low investment high return)
