


Creality K1 Series Print Settings
Released in April 2023, the Creality K1 and K1 Max define the pinnacle of Creality's lineup. Boasting a remarkable max speed of 600mm/s and an extraordinary acceleration of 20000mm/s², these printers deliver swift and precise prints. With a hot end that achieves a maximum flow of 32mm³/s, they're compatible with a broad spectrum of filaments including ABS, PLA, PETG, and TPU, among others.

In this article, we're going to dive deep into the printing parameter settings of the Creality K1 Series, providing users with the tools they need to troubleshoot printing issues and produce pristine creations. The Creality K1 Series is compatible with the following filaments:
| Creality K1 Series Filament | ||
| Filament Diameter | 1.75mm | |
| Hyper-Speed Filaments | ABS/Hyper-Speed PLA | |
| Standard Filaments | PLA/PETG/PET | |
| Flexible Filaments | TPU | |
| Strength Filaments | PA/ABS/ASA/PC | |
| Wear-Resistant Filaments | PLA-CF/PA-CF/PET-CF | |
Now, let's take the K1 Max Printing Parameter Setting step by step as follows:
1. Slicing Settings
-
Open the official Creality Print slicer version 4.3.6.6220 or a newer version.
-
Select the K1 Max printer.
-
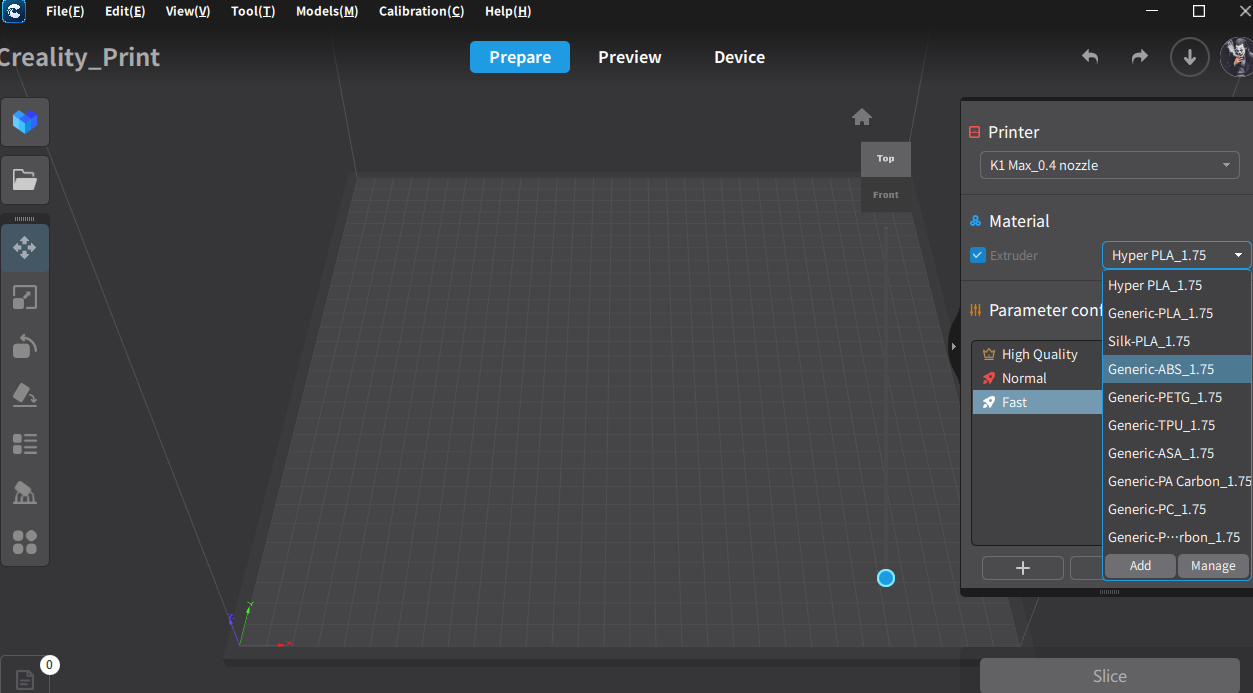
In the filament section at the top right of the interface, select "General filament" (In versions earlier than 4.3.6, this is listed as "generic").
-
If you're printing with ABS, choose "General ABS" from the filament list and then click "Slice."
-
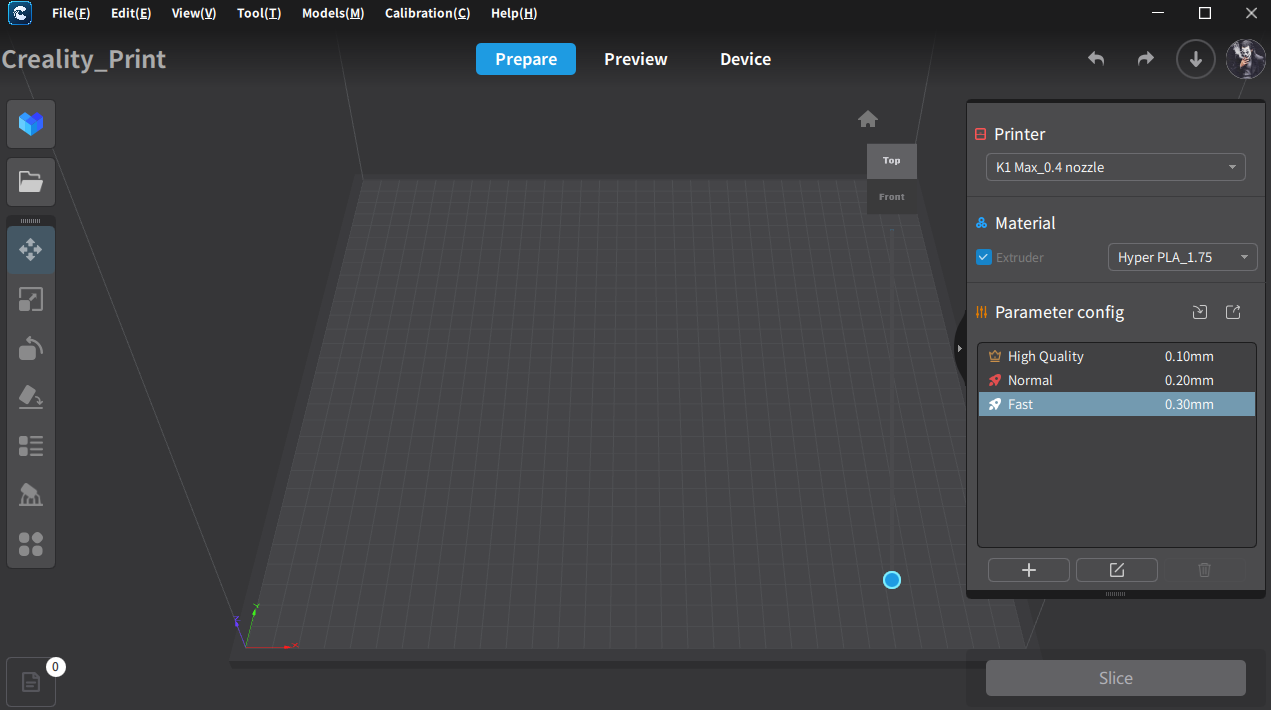
To print using Hyper PLA, select "Hyper PLA" from the filament options.
-
To print using Silk PLA, choose "Silk-PLA" from the filament options.
2. Preparing for Printing
2.1 Cleaning the Build Plate
If the layer of adhesive is excessively thick or the build plate has seen numerous print cycles, rinse it thoroughly with water.
2.2 Proper Adhesive Application
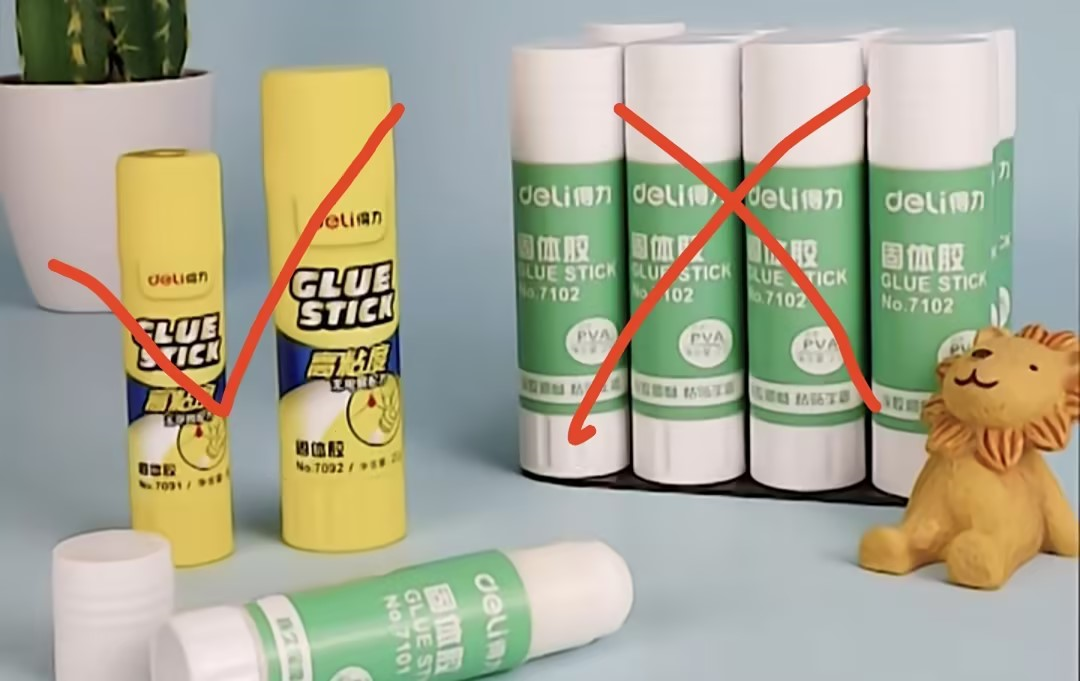
Use an appropriate glue stick. The machine includes a glue stick for your convenience, or you can opt for Deli's yellow glue stick. However, make sure to avoid using Deli's green glue sticks.
Gently apply a thin layer of the glue stick to the build plate.
2.3 Verifying the Necessity of Print Calibration
Without confirming, the processes for automatic bed leveling, flow rate calibration, and first-layer detection will not be initiated.
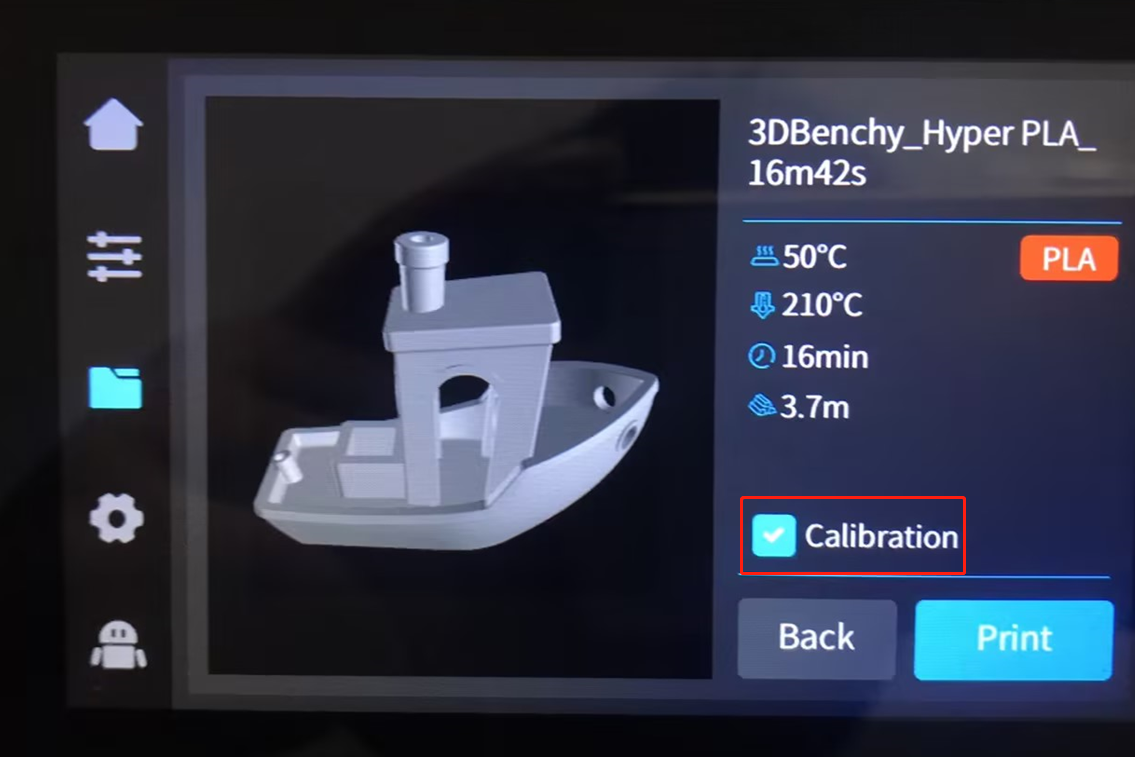
FAQs about Print Calibration
- When should you perform Print Calibration??
-
Before printing with a different type of filament than the one used in your last project, such as changing from PLA to ABS, due to differences in bed temperature and leveling adjustments.
-
If you've moved your printer to a new location.
-
Following an update to your printer's firmware.
- When is Print Calibration not necessary?
-
If you're reprinting a model that previously printed successfully without any issues.
-
For small models positioned at the center of the build plate, where calibration adjustments are generally less critical.
3. When printing with engineering-grade materials
4. K1 Series Recommended filament Parameters
Official Recommended Filament Parameters
| K1 Series Machine filament Universal Parameters Table | ||||||
|
Filament Names |
Nozzle Temperature (°C) |
Bed Temperature (°C) |
Optimal Printing Speed (0.2mm Layer Height) mm/s |
Maximum Volume Flow mm³/s |
Model Cooling |
Auxiliary Cooling |
| Hyper PLA | 220 | 45 | 300 | 23 | 100% | 80% |
| CR-PLA | 230 | 45 | 150 | 20 | 100% | 80% |
| PLA-silk | 230 | 45 | 120 | 10 | 100% | 80% |
| Generic PLA | 230 | 45 | 200 | 18 | 100% | 80% |
| Generic PETG | 250 | 70 | 120 | 9 | 80% | 0% |
| Generic ABS | 260 | 100 | 250 | 20 | 70% | 0% |
| Generic TPU | 230 | 50 | 50 | 3.5 | 100% | 70% |
| CR-PLA Carbon | 220 | 45 | 150 | 11 | 100% | 0% |
| CR-PA Carbon | 250 | 100 | 120 | 10 | 80% | 0% |
| Generic ASA | 260 | 100 | 150 | 15 | 80% | 0% |
| Generic PC | 260 | 100 | 120 | 10 | 80% | 0% |
Notes:
2. It's advisable to apply a uniform layer of solid adhesive to the print bed to enhance the initial layer's stickiness.
3. For materials that are sensitive to moisture, such as PA/PA-CF/TPU, pre-drying or keeping them in a moisture-free setting is suggested before use.
5. Utilizing official high-speed filament is recommended to achieve superior printing results.
Recent News

6 Halloween 3D Prints for a Cosy Canadian October

Trick or Treat! Creality's Halloween Party Sale Extravaganza – A Haunting Deal is Coming!

Advantages of laser engraving (low investment high return)
