


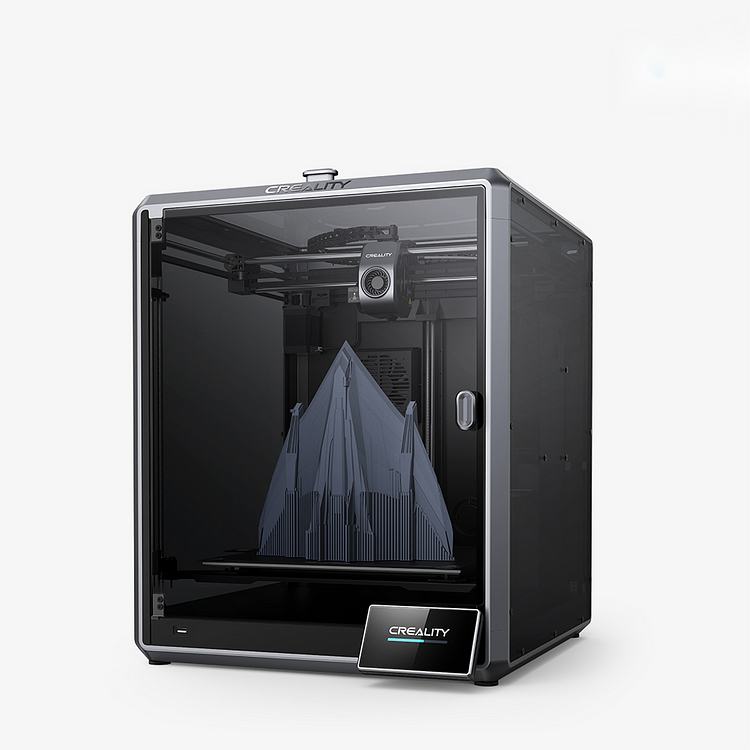
Creality K1 Max 3D Printer: Speedy. Smart. Super
【Rapid Printing: 600mm/s Speed 20000mm/s² Acceleration】
【Large Build Volume: 300x300x300mm】
【AI-assisted Carefree Printing: AI Camera & LiDAR】
【Ceramic Heater Encircles the Hotend: Max. 32mm³/s Flow】
【Core XY Nimble Setup for Speed: Agile and Swift】
【Handles temp up to 300℃ & Has an air purifier】
Creality K1 Max Third-Party Slicer G-code Setup
Tutorial
2024-12-23 09:49:07
To integrate your Creality K1 Max with third-party slicers such as Cura, PrusaSlicer, Simplify3D and others, you will need to adjust the slicer G-code file header in your slicing software. Below is a comprehensive guide to setting up these slicers for optimal performance with your K1 Max.
K1 Max AI Fast 3D Printer
Overview
Before diving into the specifics for each slicer, let’s go over the general settings you'll need to use:
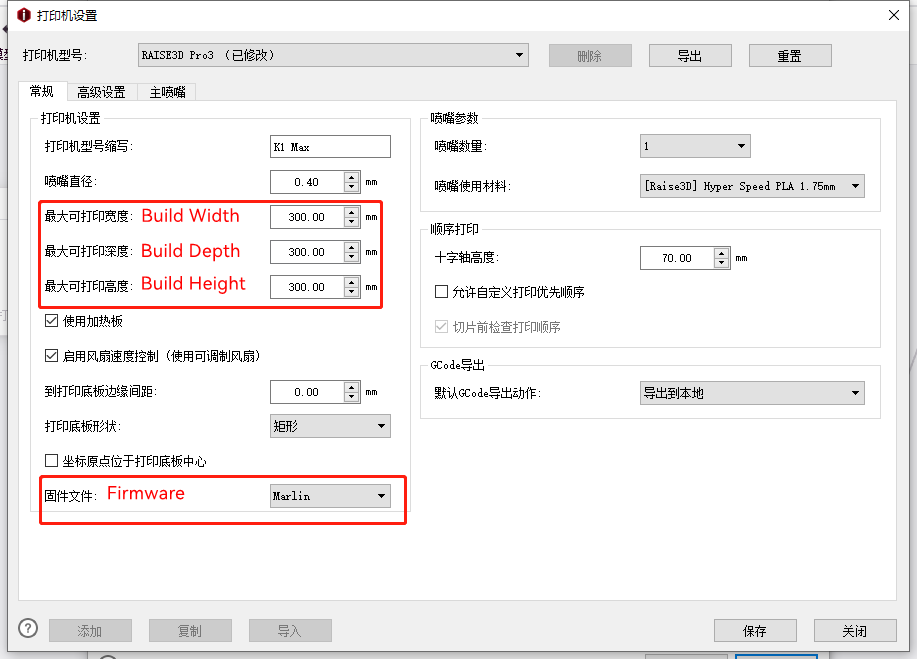
- G-code Flavor Setting: Marlin2/ Klipper
- Print Size Setting: 300x300x300 mm
- Thumbnail Size Setting: 96x96, 300x300
To enable the auxiliary fan at the beginning of the material G-code, insert the following command:
M106 P2 S255 ; Fan speed range: 0-255
1. Creality Print

For versions V4.2.0.4273 and above, the setup is pre-configured, and no further changes are required. Tools > Manage Printer > G-code:
M140 S0
M104 S0
START_PRINT EXTRUDER_TEMP=[material_print_temperature_layer_0] BED_TEMP=[material_bed_temperature_layer_0]
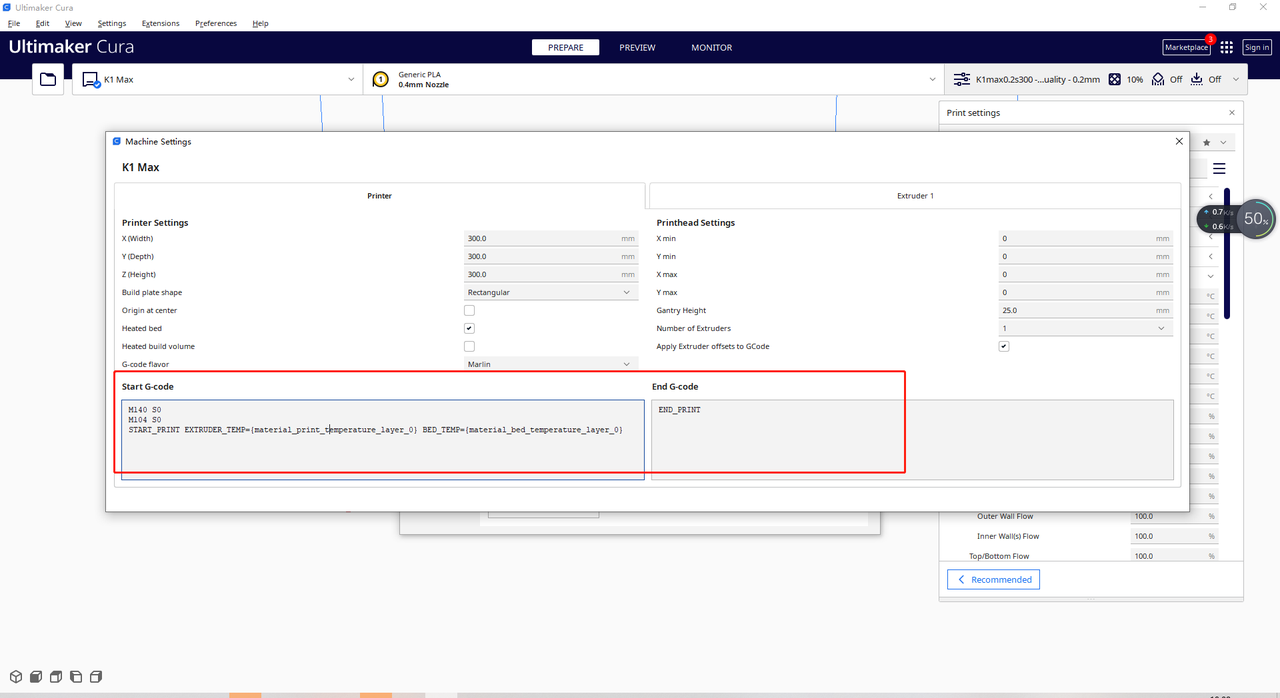
2. Cura
For Cura, Machine Settings > Start G-code, modify the startup G-code as follows:
M140 S0
M104 S0
START_PRINT EXTRUDER_TEMP={material_print_temperature_layer_0} BED_TEMP={material_bed_temperature_layer_0}
3. Simpfy3D
For Simplify3D, FFF Settings > Scripts > Starting Script, use this G-code configuration:
M140 S0
M104 S0
START_PRINT EXTRUDER_TEMP=[extruder0_temperature] BED_TEMP=[bed0_temperature]
4. PrusaSlicer
In PrusaSlicer, Printer Settings > General > Custom G-code > Start G-code, the startup G-code looks like this:
M140 S0
M104 S0
START_PRINT EXTRUDER_TEMP=[first_layer_temperature] BED_TEMP=[first_layer_bed_temperature]
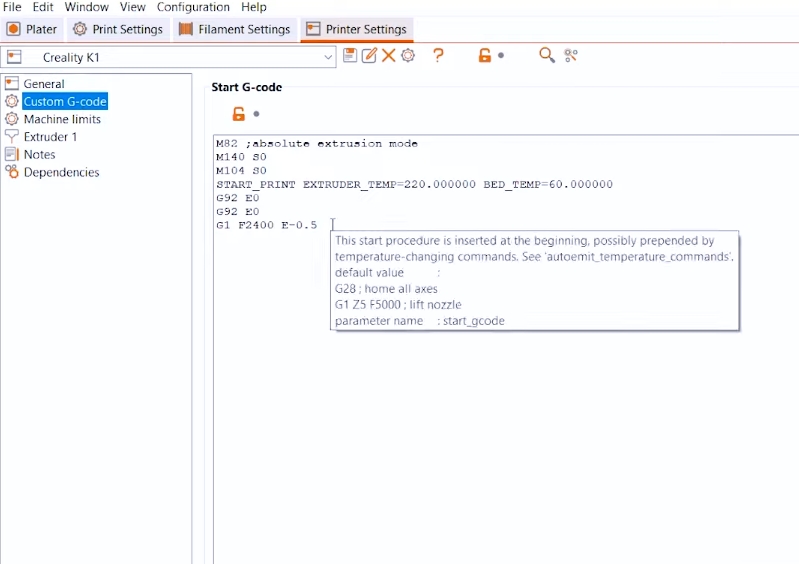 K1 Max Orca Custom G-code settings are the same as the K1
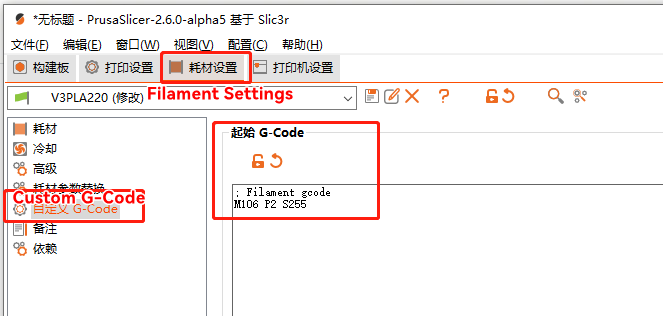
K1 Max Orca Filament Custom G-code Settings
5. OrcaSlicer
Printer Settings > Machine G-code, The startup G-code for OrcaSlicer is:
M140 S0
M104 S0
START_PRINT EXTRUDER_TEMP=[nozzle_temperature_initial_layer] BED_TEMP=[bed_temperature_initial_layer]

You can also download and import configuration files from the provided link.
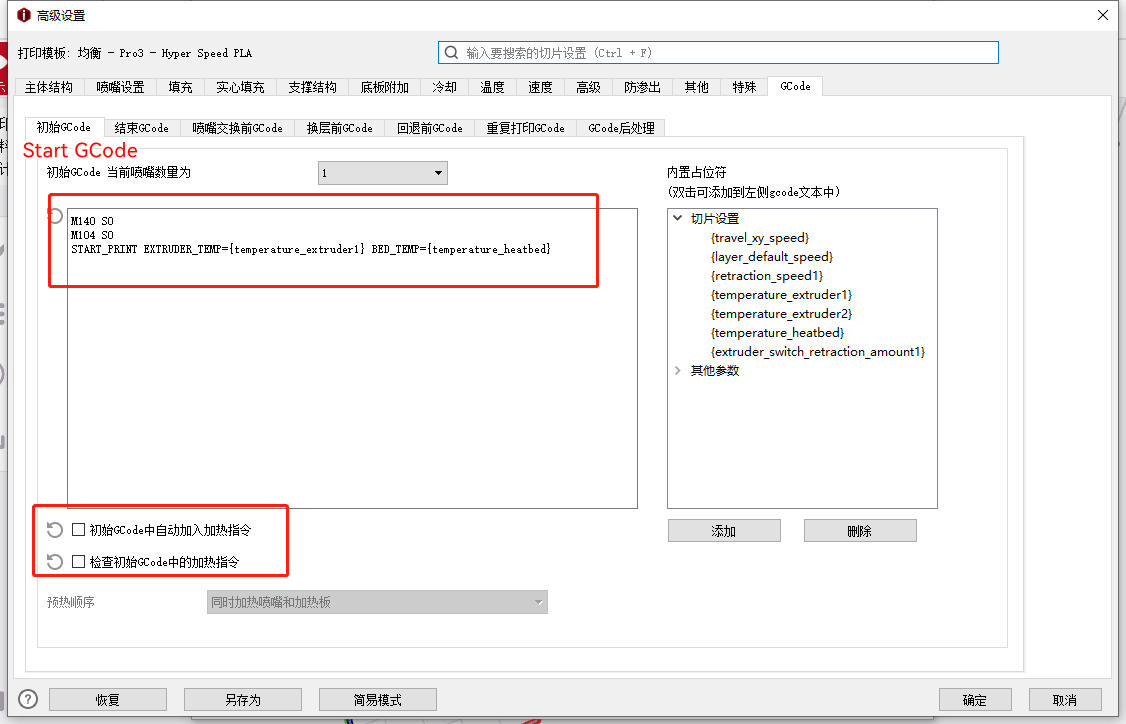
6. IdeaMaker
For IdeaMaker, Advanced Settings > G-code Tab > Start G-code, set up the G-code as follows:
M140 S0
M104 S0
START_PRINT EXTRUDER_TEMP={temperature_extruder1} BED_TEMP={temperature_heatbed}
7. SuperSlicer
Lastly, for SuperSlicer, the startup G-code is:
M140 S0
M104 S0
START_PRINT EXTRUDER_TEMP=[first_layer_temperature] BED_TEMP=[first_layer_bed_temperature]
 Related Article:
K1 Max Filament Guide : How to Load & Unload & Change Filament >>
Conclusion
By following these configuration settings, you can successfully set up your Creality K1 Max with a variety of third-party slicers, ensuring optimal printing performance. If specific slicer configurations are required, they can typically be downloaded directly from the respective slicer software's resources.
Read more if you are interested in:
Recent News

Tutorial
2026-09-20
Creality Ender 3D Printers Compared: Which Printer Is Better for You?
The Creality Ender Series has changed considerably since the first Ender-3 became a familiar choi...

Tutorial
2026-08-24
3D Printer Nozzle Blocked? Causes and Safe Fixes
Weak or missing extrusion does not always mean the nozzle is fully blocked. Check the spool, fila...

Tutorial
2026-08-18
10 Best Back-to-School 3D Prints for Students in 2026
Back-to-school season is a great time to put your 3D printer to practical use. From desk organise...

Tutorial
2026-07-13
Creality Top 5 Beginner 3D Printers: 2026 Full Guide
Choosing your first 3D printer should be simple. The best beginner 3D printer is not always the m...