


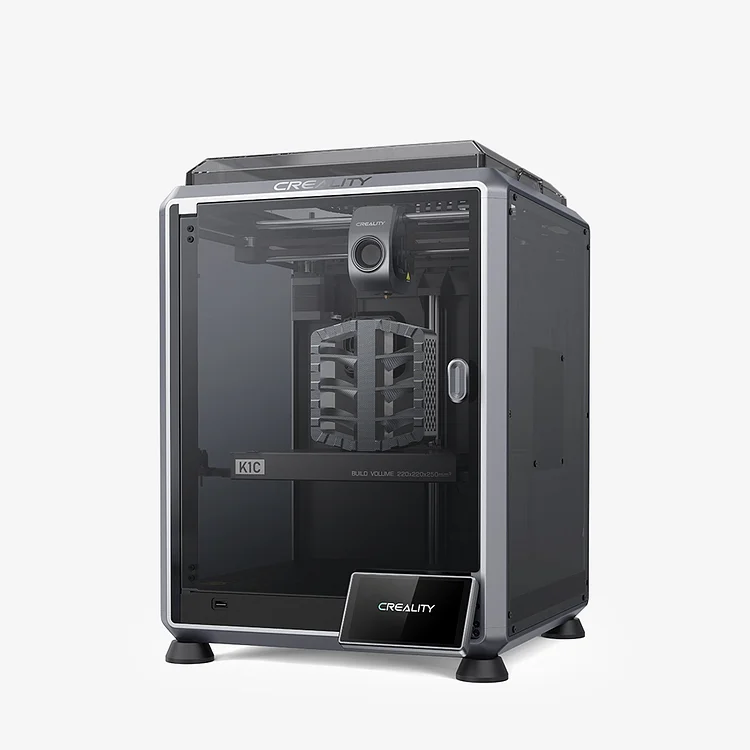
Creality K1C 3D Printer
【Clog-free Extruder Kit】
【600mm/s Max Printing Speed】
【Observant Al Camera】
【Hands-free auto leveling】
【220*220*250mm Build Volume】
K1 Series: The Wrong Model Skips Function Guide
all
2024-12-23 04:57:58
Creality's K1 series has a cool new feature to make your 3d printing life easier—the Wrong Model Removal Function. This handy tool lets you skip over problem models without stopping the whole print job.
Let's start!
K1C 3D Printer
Step-by-Step Guide to Using The Wrong Model Removal Function
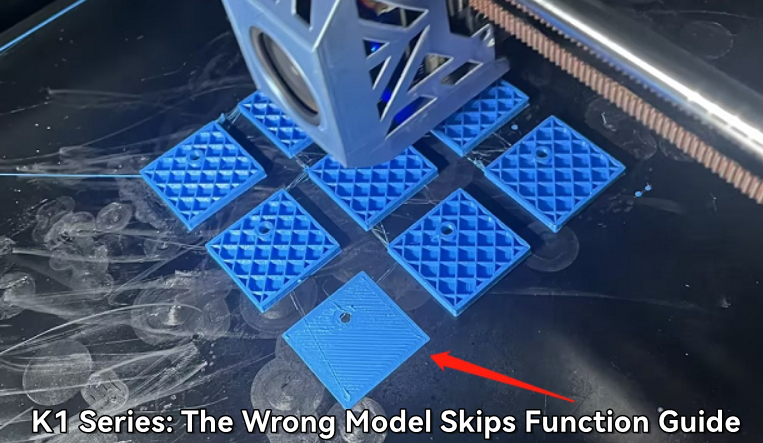
Preparatory Requirements:
Print multiple models simultaneously: To utilize this function, it's essential to start by printing multiple models in one go. This setup is crucial for understanding how the function can isolate and address specific problematic models.
Firmware and Software Updates: Ensure that your machine's firmware is updated to the latest version. The printer firmware should not be below the specified version. Additionally, your Creality Print version must be no less than 4.3.8.6965.
Star the Print Job: The function is accessible only after the printing job has commenced. This on-the-fly feature allows real-time adjustments during the printing process.
Operational Steps:
1. Access the Main Interface
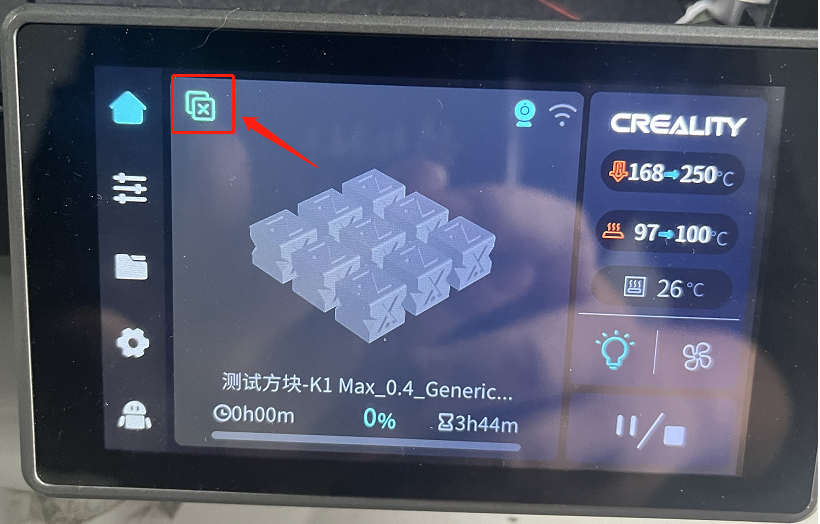
Begin by navigating to the main interface of the Creality K1 series 3D printer. Here, you'll manage and monitor ongoing printing tasks.
2. Identify the Problematic Model
At the main interface’s upper left corner, click on the specific icon designated for model management.
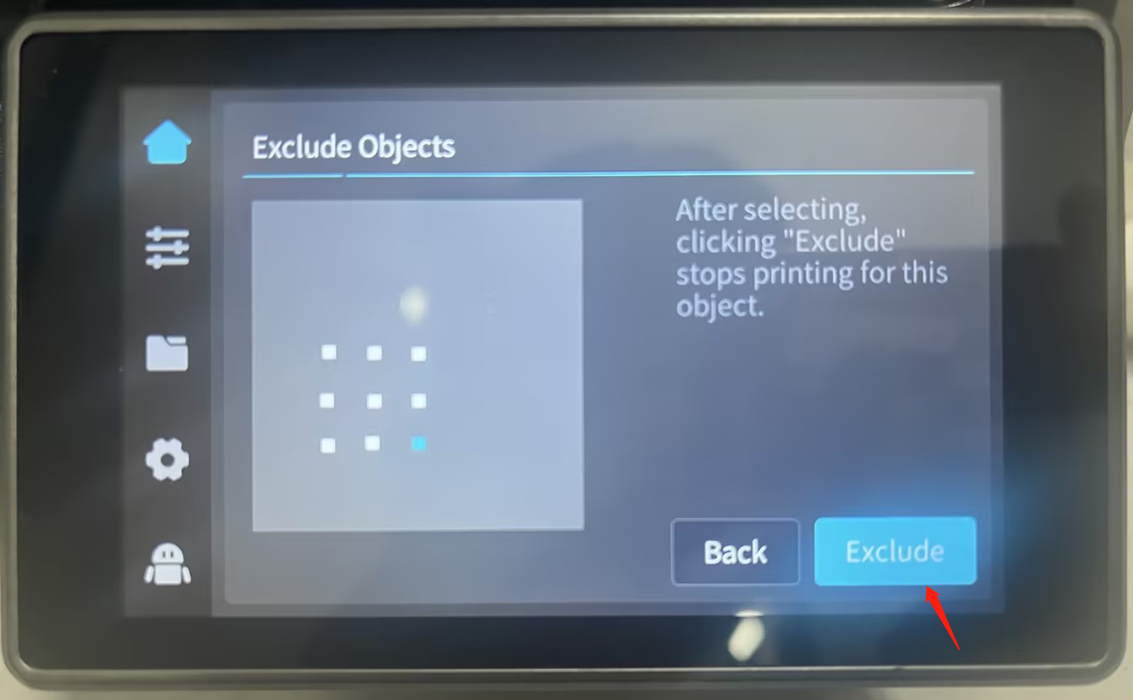
3. Mark & Skip the Model
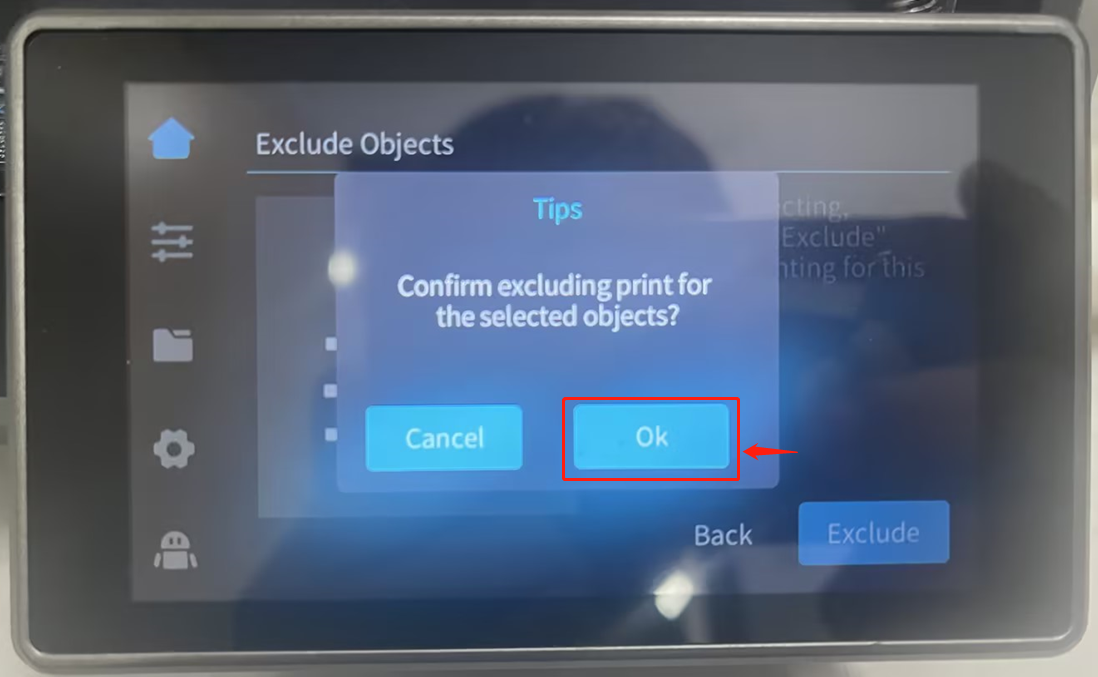
- Model Selection: Pick the model that is presenting issues by interacting directly with it through the interface.
- Skip Command: Once the problematic model is selected, click on the ‘Skip’ option to initiate the process of exclusion.
4. Confirm Skip Operation
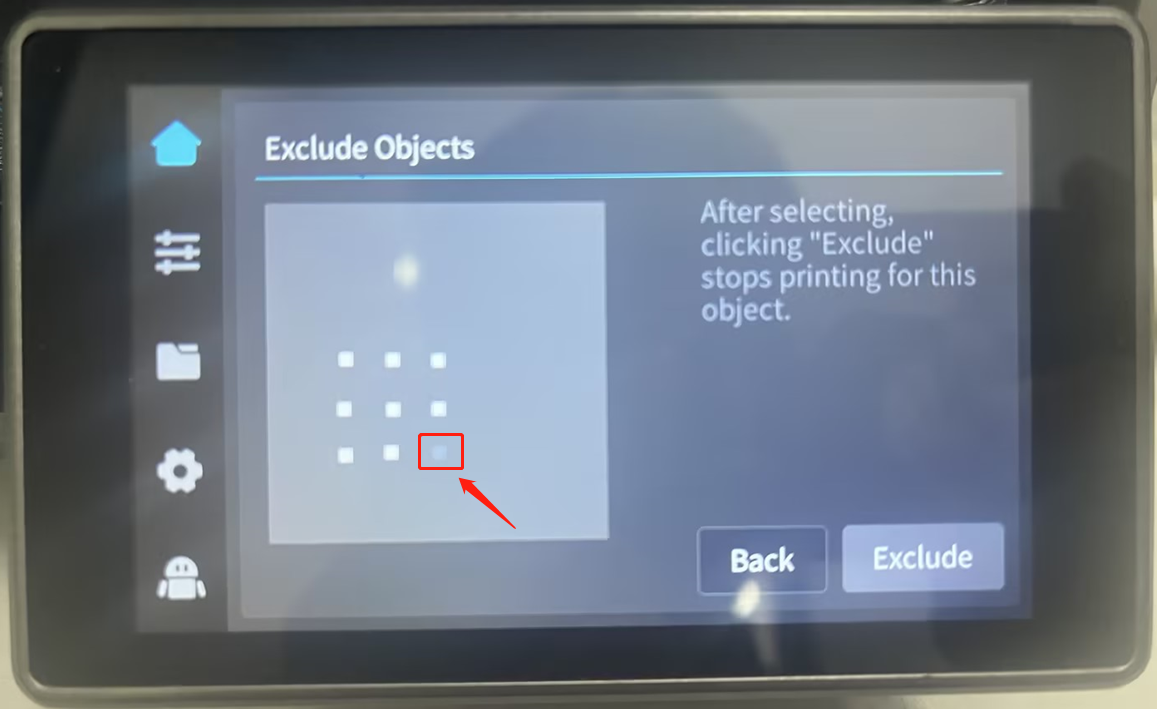
- A dialog box will pop up asking for confirmation. To proceed, click ‘Confirm.’
- Post-confirmation, the model in question will appear darker in color on the interface, indicating its removal from the active printing queue.
5. Finalize the Adjustment
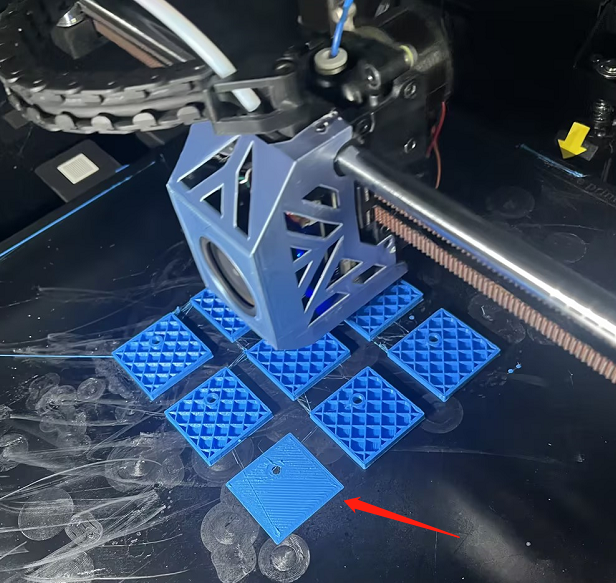
Once set, the printer smartly stops printing the problematic model. However, it continues, uninterrupted, with the remaining parts of the print job. This ensures overall project efficiency by targeting only specific model inaccuracies.
Maximize Efficiency with Phenomenal Ease
Material Conservation: By ceasing any further filament usage on defective models, this function underscores the importance of conserving 3D printing materials, which can be relatively costly.
Time Management: Maximizes productivity by not requiring a full restart every time there’s an error, hence, streamlined temporal efficiency.
User-Friendliness: Intuitive steps and clear on-screen prompts make it accessible even for novice users, ensuring fewer disruptions.
Conclusion
The Wrong Model Removal Function of the K1 series encapsulates Creality’s commitment to enhancing the consumer printing experience. By pinpointing issues diligently and offering straightforward solutions, users enjoy smoother, faster, and more material-efficient 3D printing adventures. Don’t let a troublesome model dampen your productivity—embrace the full potential of the K1 series with this impressive and intuitive feature.
For more Creality 3D Printer, you can click the related articles as follows:

Recent News

all
2026-10-13
8 Halloween 3D Print Ideas to Make Before October 31
Halloween is coming, and the candy stash has already suffered a few unexplained disappearances. W...

all
2026-09-18
Ender Series 3D Printers Parameter Comparison
The Creality Ender Series has evolved significantly since the original Ender-3. What began as an ...

all
2026-08-02
Creality Back-to-School Sale 2026: Save Up to 50% on 3D Printers and More
A new school year is a chance to start fresh projects, develop practical skills and turn digital ...

all
2026-05-26
Is PLA Recyclable?
PLA is a biodegradable plastic derived from renewable resources such as corn starch or sugarcane....