


Creality K2 Plus & CFS Firmware Upgrade Guide
For Creality's K2 Plus and Controlled Filament System (CFS), staying updated with the latest firmware versions enhances performance, adds new features, and resolves potential issues.
This guide provides a detailed overview of upgrading and managing firmware for both the K2 Plus printer and the CFS, whether via a USB drive or through online methods.
1. Firmware Overview
K2 Plus Firmware
The K2 Plus firmware comes in .img format. This firmware controls the printer’s core functionalities, including motion control, interface responsiveness, and advanced features like Input Shaping and Auto Leveling. Regular updates ensure that these systems are optimized for the best printing results.
CFS Firmware
The CFS firmware, provided in .bin format, manages the Controlled Filament System. This component handles filament loading, unloading, and humidity control. Upgrading the CFS firmware is essential to maintaining compatibility with the K2 Plus printer and ensuring the system can properly detect and manage filament types, especially RFID-tagged materials.
When upgrading the K2 Plus firmware, the system automatically checks the CFS version. If an outdated CFS firmware version is detected, the system will prompt or force an upgrade to maintain synchronization between the two components.
2. Upgrading/Downgrading Firmware via USB Drive
2.1 Checking the Firmware Version
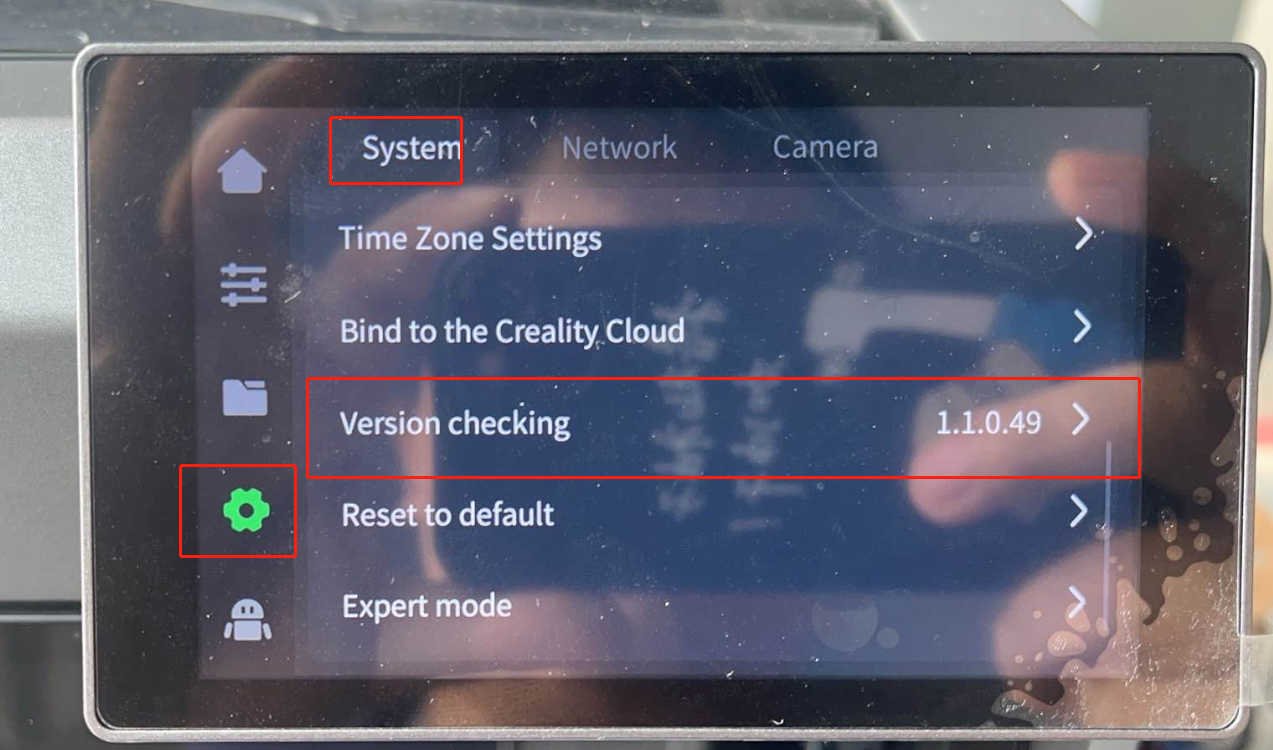
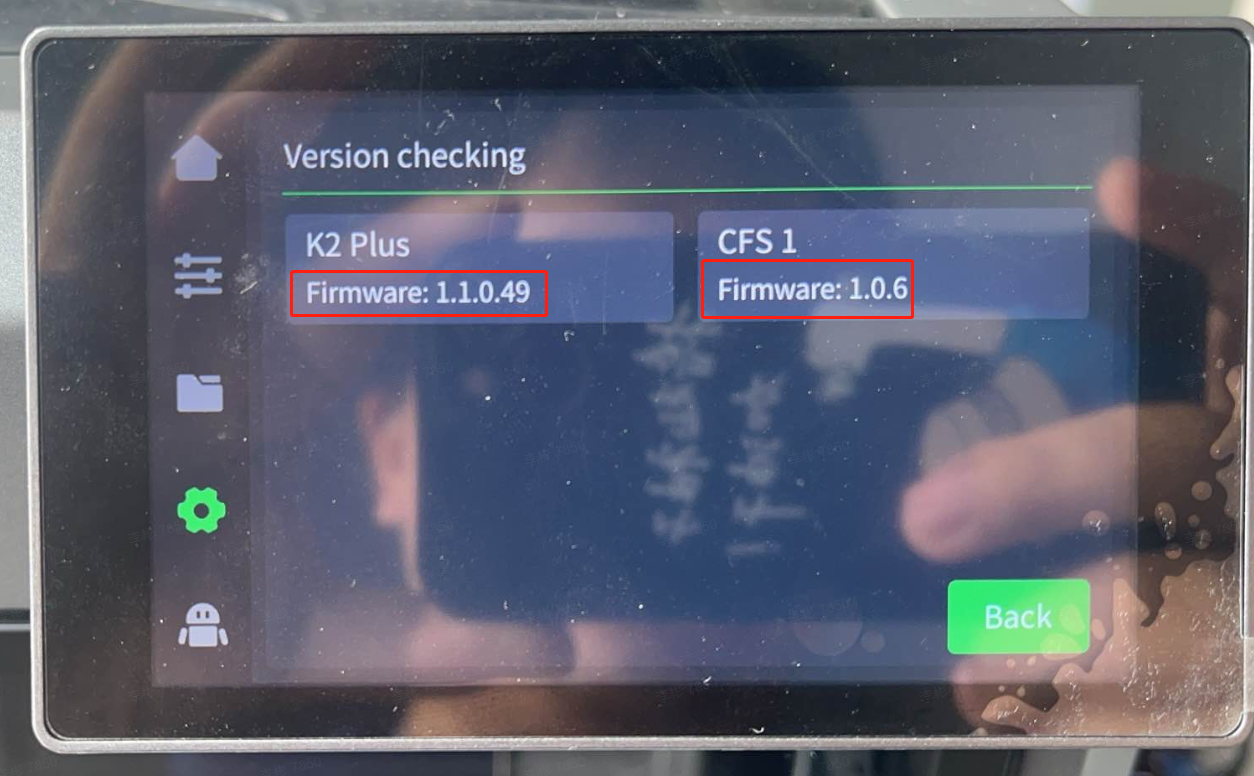
Before starting an upgrade, it’s important to verify the current firmware version. Navigate to the printer’s firmware version section on the control screen. This will display the currently installed version, allowing you to determine if an update is necessary.
2.2 Downloading the Correct Firmware
Firmware updates for both the K2 Plus and CFS can be downloaded from Creality's official platform. The most reliable source is CrealityCloud, which provides the latest firmware versions along with detailed release notes.
2.3 Steps for USB Firmware Upgrade/Downgrade
Step 1:
- Download the appropriate firmware files for the K2 Plus or CFS and save them to a USB drive.
- If you have firmware files for both the CFS and K2 Plus, it’s advisable to update the CFS firmware first. This sequence ensures the printer’s control systems are properly aligned.
- Confirm that the files have been successfully transferred to the USB drive to avoid potential installation issues.
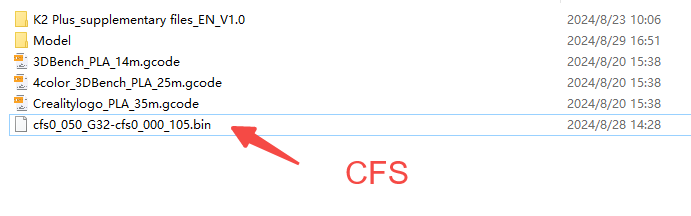
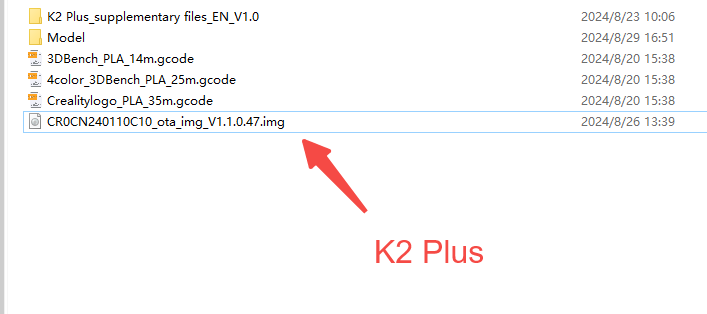
Step 2:
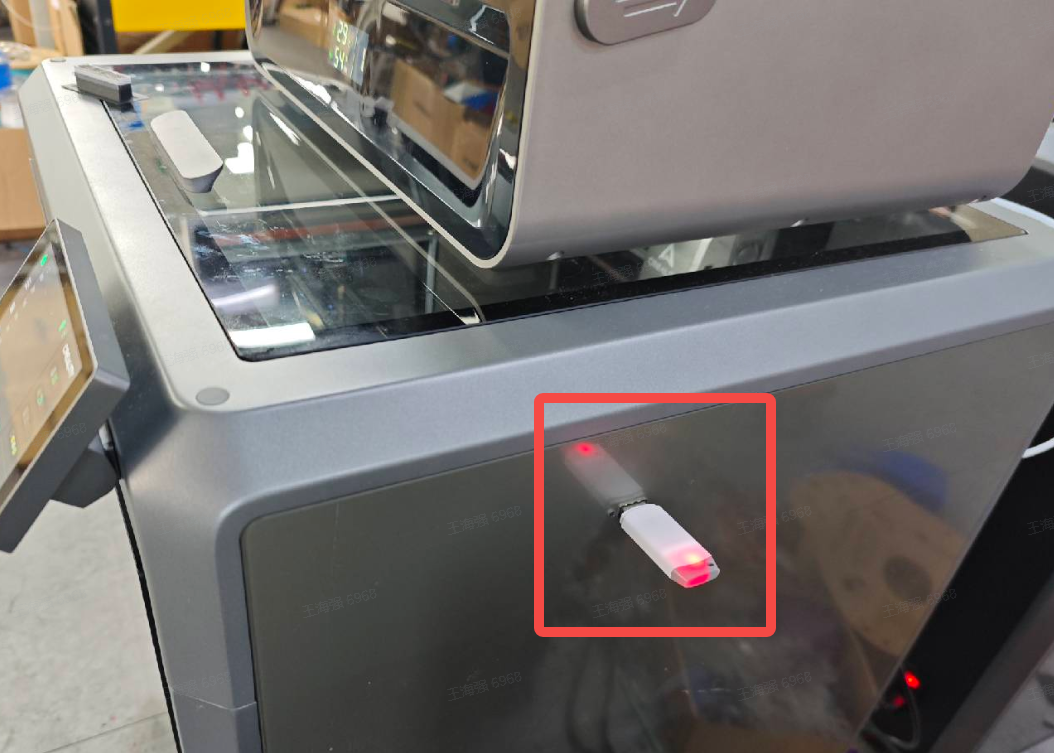
- Insert the USB drive into the printer’s USB port.
- Access the Upgrade option from the printer’s menu. Click to start the upgrade process.
- Wait for the process to complete. The printer will automatically restart to apply the new firmware.
Post-Upgrade Configuration:
After upgrading, some additional settings must be configured:
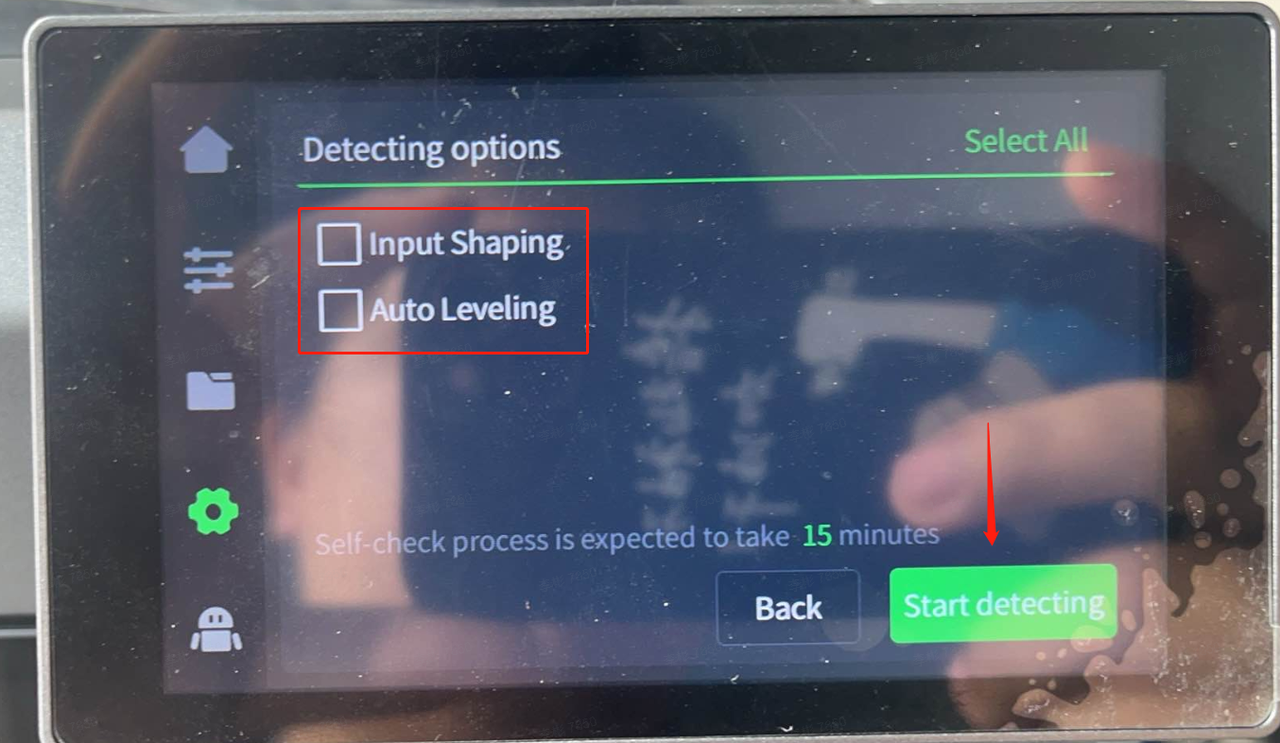
- Navigate to Settings → Detecting Options.
- Enable Input Shaping, an advanced calibration feature that reduces vibration during printing. Start the detection process and allow the printer to calibrate itself.
Note: Ensure you exit the filament menu before performing Input Shaping, as this can interfere with the calibration process.
Online Firmware Upgrade
Prerequisites for Online Upgrades
- Ensure that your K2 Plus printer is connected to the internet.
- The printer must be linked to your Creality Cloud account, allowing seamless firmware downloads and updates.
Step-by-Step Online Upgrade Process
Step 1:
- Go to Settings → Version Checking.
- If a new firmware version is available, a red dot notification will appear next to the version information. This visual cue ensures you don’t miss critical updates.
- If multiple CFS units are connected, disconnect all but one. This prevents conflicts during the update process—a limitation expected to be resolved in future firmware versions.
Step 2:
Click Download to initiate the firmware download. Once the download is complete, the system will automatically begin the installation.
Step 3:
Allow the installation to complete. The printer will restart automatically, ensuring the new firmware is applied correctly.
Step 4:
- After the restart, access Settings → Detecting Options.
- Enable both Input Shaping and Auto Leveling. These features optimize the printer’s performance and ensure accurate, consistent printing.
- Start the detection process. Once the calibration is complete, the printer is ready for operation.
Final Thoughts
Upgrading the firmware for your K2 Plus printer and CFS is a straightforward yet crucial process, whether using a USB drive or updating online through Creality Cloud, following the correct steps guarantees a smooth upgrade experience. By keeping your firmware up-to-date, you not only enhance your printer's capabilities but also extend its lifespan, ensuring consistent, high-quality 3D printing results.
For more Creality 3D Printer, you can click the related articles as follows:
Recent News

8 Halloween 3D Print Ideas to Make Before October 31

Ender Series 3D Printers Parameter Comparison

Creality Back-to-School Sale 2026: Save Up to 50% on 3D Printers and More
