


Ender 3 Series Explained: Ender 3 S1, V2, Pro Bed Size
With its reasonable print quality, heated bed, and affordable price tag, the Creality Ender 3 is a popular choice for 3D printing hobbyists and DIYers. However, one of its main limitations is its relatively small Ender 3 bed size, and you may have heard mixed reviews regarding the actual versus advertised Ender 3 bed sizes.
While Creality offers larger printers like the Creality CR-10 and K1 Max, many users prefer the Ender 3 (and its V2/Pro variants) due to its low price and user-friendly interface. Consequently, there is a natural inclination to explore ways to maximize or extend the Ender 3 bed size through firmware and hardware modifications.
Keep reading to learn more about why this is the case and what you can do about it.

What are the dimensions of Creality’s Ender 3 Series Bed?
The Ender 3 (including the Ender 3 S1, Ender 3 V2, and Ender 3 Pro) has a print area of 220 x 220 x 250 mm. Additionally, the Ender-3 Neo, Ender-3 V2 Neo, and the new models Ender-3 V3 SE and Ender-3 V3 also have the same 220 x 220 x 250 mm bed size.
The actual print bed size of the Ender 3 (including the Ender 3 V2 and Ender 3 Pro) measures 235 x 235 mm. Meanwhile, the total size of the device is 440 x 410 x 465 mm.
The overall machine size of the Ender 3 varies depending on the specific model:
- Ender 3: 440 x 440 x 465 mm
- Ender 3 V2: 475 x 470 x 620 mm
- Ender 3 Pro: 440 x 420 x 465 mm
- Ender 3 S1: 487 x 453 x 622 mm
- Ender 3 V3 SE: 430 x 366x 490 mm
- Ender 3 V3 KE: 433 x 366 x 490 mm
- Ender 3 V3: 358 x 374 x 498 mm
- Ender 3 V3 Plus: 410 x 445 x 577 mm
The Difference Between Ender 3 Bed Size and Print Area
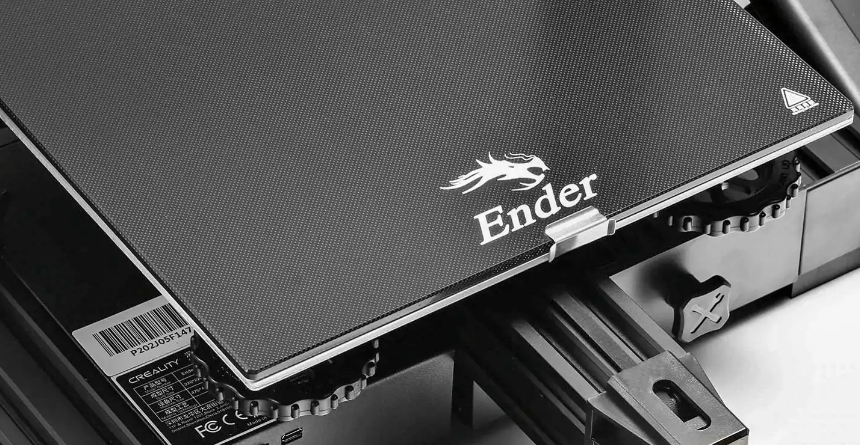
The difference between the Ender 3, Ender 3 Pro, and Ender 3 V2 bed size and print area is 15 mm on both the X and Y axes. This means that, in theory, an astonishing 14% of the print bed is going unused. The actual Ender 3 max bed size might come as a surprise to you.
Continue reading to understand why this is the case.
Clips
The principal reason the print volume of the Ender 3 differs from the actual dimensions of the build plate is clips. Standard office binder clips attach the removable build plate to the print bed, encroaching on its usable area. Creality's firmware limits the print size to 220 x 220 mm to prevent printing over the clips. Users can replace these clips with more compact options or use alternative attachment methods, like the Ender 3 Pro's magnetic surface, to maximize the print area.
Tolerance stack up
Creality adds a 15 mm buffer on the X and Y axes to prevent the printhead from depositing material off the edge, similar t o how a 2D printer avoids overprinting. This extra space also compensates for potential misalignments and "tolerance stack-up" due to varied mechanical joints and rods in the Ender 3's construction, ensuring more reliable 3D prints.
How to Change the Ender 3 Bed Size with 4 Simple Ways
If 220 x 220 mm is insufficient for your prints, consider these strategies for expanding the Ender 3, Ender 3 S1, Ender 3 Pro, or Ender 3 V2 print area through firmware updates, hardware modifications, and slicing software adjustments.
Upgrade Your Firmware
The default print area is set in the firmware, so simply changing slicer settings won’t work. Update the Ender 3 firmware to Marlin or Jyers to specify a larger build area if you've made physical space at the bed edges. This is easier on the Ender 3 V2 due to its pre-installed bootloader. The Jyers GitHub page has suitable firmware versions.
Physical Bed Extension
Modifying your printer to physically extend its bed is an option, especially if you need more than an extra 10–15 mm. Kits like Ender Extender and Endzilla can increase the bed size to 400 x 400 mm, but note that these can be expensive.
Priming and Skirt Settings
Ensure you get the maximum print area by adjusting skirt settings in your slicer software. Reducing the skirt line count in Cura under Build Plate Adhesion settings can help you utilize the full print bed.
Belt and Rod Adjustment
Ensure X and Y belts are properly tensioned. Align and secure the rods for optimal movement. Lubricate and clean rods to reduce friction. Finally, recalibrate the firmware to recognize the extended print area. These steps help maximize the usable print space.
Creality 3D Printers Bed Size Chart
Creality Ender "Plus" and "Max" models have larger build areas. Newer "Neo" models offer similar volumes with added features. For larger prints, consider pricier options like the Ender 3 V3 Plus (300 x 300 x 330 mm).
The Creality Ender 3 has good firmware for standard print sizes, but you can upgrade firmware or modify the printer physically for larger builds. Hands-on users may find this beneficial, while beginners might prefer using it at default settings to avoid complications.
| Product Name | Print Area(mm) | Price($) |
|---|---|---|
| Ender 3 | 220x220x250 | 168.99 |
| Ender 3 Pro | 220x220x250 | 236 |
| Ender 3 V2 | 220x220x250 | 179 |
| Ender 5 Plus | 350x350x400 | 492 |
| Ender 3 S1 | 220x220x270 | 175 |
| Ender 3 S1 Plus | 300x300x300 | 279 |
| Ender 3 Neo | 220x220x250 | 159 |
| Ender 3 V2 Neo | 220x220x250 | 179 |
| Ender 5 S1 | 220x220x280 | 315 |
| Ender 3 V3 SE | 220x220x250 | 199 |
| Ender 3 V3 KE | 220x220x240 | 279 |
| Ender 3 V3 | 220x220x250 | 389 |
| Ender 3 V3 Plus | 300x300x330 | 479 |
Recommended reading:
Conclusion
The Creality Ender 3 has good firmware for standard print sizes, but you can upgrade firmware or modify the printer physically for larger builds. Hands-on users may find this beneficial, while beginners might prefer using it at default settings to avoid complications.
Read more if you are interested in:
Recent News

8 Halloween 3D Print Ideas to Make Before October 31

Ender Series 3D Printers Parameter Comparison

Creality Back-to-School Sale 2026: Save Up to 50% on 3D Printers and More
