


Glue Stick for 3D Printing: What, Why and How
3D printing is a fascinating world of creation and innovation. However, like any craft, it comes with its own set of challenges. One such challenge is ensuring proper bed adhesion. This is critical to the success of your 3D prints.
A popular solution to this problem is to use a glue stick, but not just any glue stick will work. The type of glue stick you use can have a significant impact on the quality of your prints. It can be the difference between a flawless creation and a distorted disappointment.
In this guide, we'll cover all aspects of 3D printing glue sticks, from what they are and why they're used, to how to apply them effectively, along with some helpful tips.
Understanding 3D Printer Bed Adhesion
Bed adhesion is a critical aspect of 3D printing. It refers to how well the first layer of your print adheres to the print bed. Good bed adhesion ensures that your print stays in place throughout the printing process. It prevents warping and other print deformations.
On the other hand, poor bed adhesion can lead to print failures. The print can shift or warp, ruining the final product. So, the bed adhesion is the first step in achieving high-quality 3D printing. It's the foundation upon which successful 3D printing is built.
Why Use a Glue Stick for Your 3D Printer Bed?
Glue sticks are a popular choice for improving bed adhesion in 3D printing. They are easy to use and widely available. When applied to the print bed, a glue stick creates a thin adhesive layer, helping the first print layer stick better to the bed.
Glue sticks are especially useful when printing on materials that tend to warp, ensuring a smooth first layer.
In addition, glue sticks are easy to clean off the print bed, making maintenance a breeze.
How to Apply Glue Stick on a 3D Printer Bed
Applying a glue stick on a 3D printer bed is a straightforward process. First, ensure the print bed is clean and free from any dust or debris.
Next, take the glue stick and apply it evenly across the surface of the print bed. Make sure to cover the entire area where the print will be placed.
After applying, let the glue dry for a few minutes before starting the print. This allows the glue to adhere properly to the bed.
Remember, a thin, even layer of glue is often enough to provide good adhesion.
Can You Use Any Glue Stick for 3D Printing?
While any glue stick can provide some level of adhesion, not all are ideal for 3D printing. Standard office glue sticks may not provide the same level of adhesion as those designed specifically for 3D printing.
Choosing the right glue stick for your 3D printing project depends on the type of filament you're using. Different materials have different adhesion requirements.
For example, PLA, a common filament, often works well with most standard glue sticks. However, materials like ABS or PETG may require a stronger adhesive.
Here are some general guidelines:
- PLA: Standard glue stick
- ABS: Stronger glue stick
- PETG: High tack glue stick
Remember, these are just recommendations. It's always best to test different glue sticks to find the one that works best for your specific printing setup.
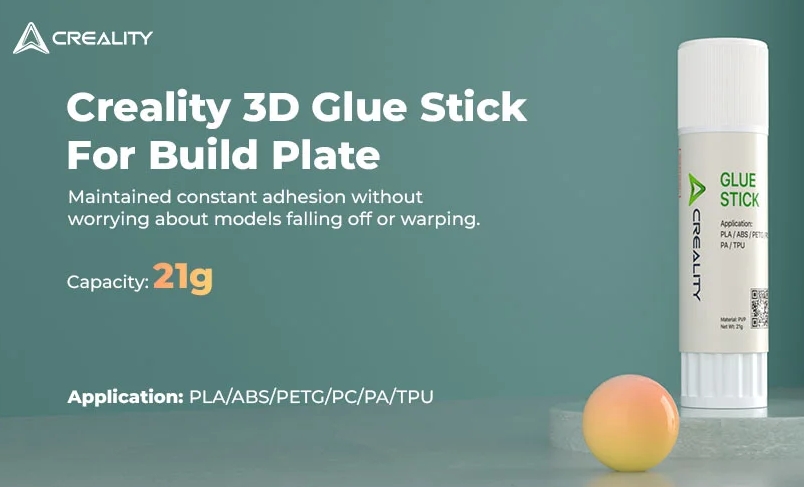
The Creality glue stick for build plate: Ensure consistent adhesion and prevent model warping with ease. Made from high-quality PVP material, it provides strong adhesion to a variety of filament types, including PLA, ABS, PETG, PC, PA, TPU, and more. Safe, non-toxic and environmentally friendly, with a PP tube for extended use.
How to Clean Glue Stick off 3D Printer Bed
Cleaning your 3D printer bed is critical to maintaining optimal print quality. Over time, glue stick residue can build up on the bed and affect adhesion.
To clean the bed, start by heating it slightly. This will make it easier to remove glue residue. Use a plastic scraper or spatula to gently scrape off the residue. Then wipe the bed with a damp cloth. If the residue is stubborn, you can use a mild solvent such as isopropyl alcohol. Always make sure the bed is completely dry before starting a new print.
Tips for Maximizing Bed Adhesion with Glue Sticks
Maximizing bed adhesion with glue sticks requires 4 key steps.
1. Make sure your print bed is clean and free of dust or grease. This can be accomplished with a simple wipe with isopropyl alcohol.
2. Apply the glue stick evenly across the print bed. Avoid creating bumps or irregularities that could affect the first layer of your print.
3. Consider environmental factors. Humidity and temperature can affect the performance of your glue stick. Make sure your print area is well ventilated and at a consistent temperature.
4. Remember to reapply the glue stick as needed. Over time, the glue can lose its adhesive properties, so regular application is key to maintaining optimal print quality.
Conclusion
Achieving optimal results with glue sticks in 3D printing is a balance of many factors. From choosing the right glue stick to proper application and maintenance, each step plays a critical role.
Remember, every 3D printing setup is unique. Don't be afraid to experiment and find what works best for you.
Related articles:
3D Printer Layer Shift Troubleshooting: Top 5 Solutions
PLA Not Sticking to Bed: 7 Easy Ways
How to Clean 3D Printer Bed: An Easy-to-Follow Tutorial
Recent News

8 Halloween 3D Print Ideas to Make Before October 31

Ender Series 3D Printers Parameter Comparison

Creality Back-to-School Sale 2026: Save Up to 50% on 3D Printers and More
